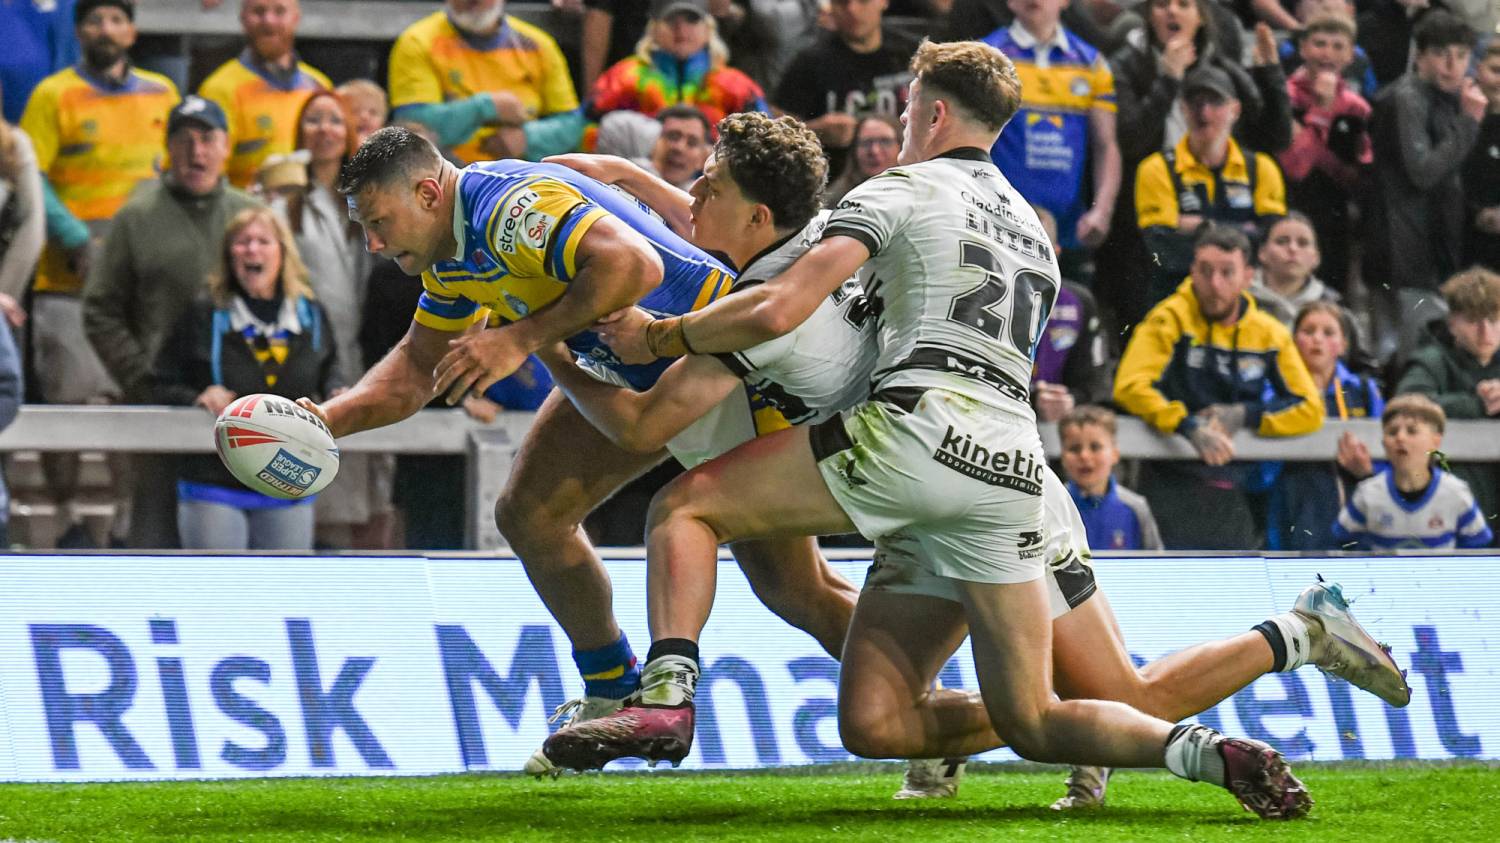
Analysis: How Hall Scored The Decisive Try

Welcome to your ultimate source for breaking news, trending updates, and in-depth stories from around the world. Whether it's politics, technology, entertainment, sports, or lifestyle, we bring you real-time updates that keep you informed and ahead of the curve.
Our team works tirelessly to ensure you never miss a moment. From the latest developments in global events to the most talked-about topics on social media, our news platform is designed to deliver accurate and timely information, all in one place.
Stay in the know and join thousands of readers who trust us for reliable, up-to-date content. Explore our expertly curated articles and dive deeper into the stories that matter to you. Visit Best Website now and be part of the conversation. Don't miss out on the headlines that shape our world!
Table of Contents
Analysis: How Hall Scored the Decisive Try – A Masterclass in Rugby Breakdown Play
The roar of the crowd is still ringing in our ears. The tension, palpable even now. We're talking, of course, about Hall's match-winning try – the moment that sealed victory for [Team Name] against [Opposing Team Name]. But what exactly made this score so decisive? Let's break down the play-by-play and analyze the key elements that contributed to Hall's breathtaking success.
The Setup: A Breakdown Battle
The scene: a fiercely contested breakdown, typical of the intense rivalry between these two teams. [Opposing Team Name] had possession, but [Team Name]'s forwards, led by the formidable [Name of Forward], were putting in a relentless effort at the ruck. This wasn't just brute force; it was strategic positioning and intelligent disruption of the opposing team's ball carrying. The key here was the speed of the breakdown – [Team Name] consistently disrupted [Opposing Team Name]'s attempts to establish a clear platform, forcing quick ball turnover opportunities.
The Crucial Turnover: A Flash of Skill
The decisive moment arrived when [Name of Player] executed a perfectly timed jackal turnover. This wasn't just a lucky steal; it was a testament to his understanding of the game and his uncanny ability to read the opposition's movements. By quickly disrupting the ball carrier and winning the turnover, he gave his team a golden opportunity to launch a counter-attack. This exemplifies the importance of breakdown dominance in modern rugby. Understanding the nuances of breakdown play is crucial for any team aiming for victory.
The Swift Transition: From Defense to Attack
The transition from defense to attack was almost seamless. The quick ball from the turnover was immediately fed to [Name of Player], who displayed remarkable composure under pressure. His quick pass to Hall, perfectly timed and weighted, is a prime example of skilled distribution in attacking play. This efficiency – avoiding unnecessary phases – kept the momentum on [Team Name]'s side.
Hall's Finishing Touch: Pace and Power
Finally, we arrive at Hall's decisive run. The space created by the preceding play allowed him to utilize his incredible pace and power. He expertly sidestepped [Name of Opposing Player], displaying remarkable agility and demonstrating a clear understanding of the defensive line's weaknesses. His powerful finish into the try zone was a display of raw strength and finishing ability – a testament to his physical conditioning and rugby skill.
The Importance of Team Work
It’s vital to remember that Hall's try wasn't a solo effort. This was a team performance, a testament to the collective effort and strategic planning that underpinned [Team Name]'s victory. From the forwards' dominance at the breakdown to the backs' slick passing game, every player played their part. This highlights the critical importance of teamwork in high-level rugby.
Conclusion: A Textbook Example of Rugby Excellence
Hall's try is a case study in modern rugby excellence. It showcased the importance of breakdown dominance, efficient transition play, and individual brilliance within a cohesive team structure. It's a moment that will be remembered for years to come, a perfect example of how even the smallest details can lead to victory. And for rugby fans everywhere, it's a breathtaking reminder of the beauty and intensity of the sport.
Want to learn more about rugby tactics and strategy? Check out [Link to a relevant article or resource].
Thank you for visiting our website, your trusted source for the latest updates and in-depth coverage on Analysis: How Hall Scored The Decisive Try. We're committed to keeping you informed with timely and accurate information to meet your curiosity and needs.
If you have any questions, suggestions, or feedback, we'd love to hear from you. Your insights are valuable to us and help us improve to serve you better. Feel free to reach out through our contact page.
Don't forget to bookmark our website and check back regularly for the latest headlines and trending topics. See you next time, and thank you for being part of our growing community!
Featured Posts
-
 Could Tom Cruise Ana De Armas And Sydney Sweeney Star In Jon Chus Next Film
May 19, 2025
Could Tom Cruise Ana De Armas And Sydney Sweeney Star In Jon Chus Next Film
May 19, 2025 -
 2025 Subway Series Unforgettable Images Of Yankees And Mets Clash
May 19, 2025
2025 Subway Series Unforgettable Images Of Yankees And Mets Clash
May 19, 2025 -
 Rugby Star Hall Details Match Winning Try Strategy
May 19, 2025
Rugby Star Hall Details Match Winning Try Strategy
May 19, 2025 -
 Liga Mx Toluca Y America Definen Al Campeon Del Clausura 2025 Previa
May 19, 2025
Liga Mx Toluca Y America Definen Al Campeon Del Clausura 2025 Previa
May 19, 2025 -
 Denied Service Because Of My Face Experiences With Facial Disfigurement
May 19, 2025
Denied Service Because Of My Face Experiences With Facial Disfigurement
May 19, 2025
Latest Posts
-
 I Will Never Regret Coming A Solo Travelers Escape From Iran Amidst Israeli Strikes
Jul 08, 2025
I Will Never Regret Coming A Solo Travelers Escape From Iran Amidst Israeli Strikes
Jul 08, 2025 -
 Analyzing You Ll Never Walk Alone And Swept Away A Comparative Headline Study
Jul 08, 2025
Analyzing You Ll Never Walk Alone And Swept Away A Comparative Headline Study
Jul 08, 2025 -
 Tick Borne Illness Threat Lyme Disease Spreads Across The Northeast
Jul 08, 2025
Tick Borne Illness Threat Lyme Disease Spreads Across The Northeast
Jul 08, 2025 -
 Headline Impact A Case Study Of You Ll Never Walk Alone Vs Swept Away
Jul 08, 2025
Headline Impact A Case Study Of You Ll Never Walk Alone Vs Swept Away
Jul 08, 2025 -
 Deadly Texas Floods A Community Responds To The Crisis
Jul 08, 2025
Deadly Texas Floods A Community Responds To The Crisis
Jul 08, 2025

